Paintbrushes (your choice)
Painters tape
Acrylic paint
Scissors
Cling wrap (optional)
Step 1: Remove the dust jacket from your book. Take a napkin and clear off any dust on the pages.
Step 2:
Option 1: Wrap the cling wrap around the edges of the book and tape the clean wrap down. Making sure to secure all the edges
Option 2: only use the tape to secure the edges and don’t use the cling wrap
 |
| option 2 |
 |
| option 1 |
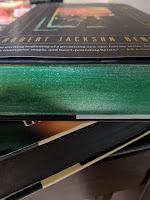
I personally just use a bunch of books stacked on top of the book I will be painting, pictured on the left.
Step 4: paint the edges
Step 5: let the paint dry, takes about 20 minutes. Once dry remove the edge protection. (or paint on a second layer/design on top of your base paint)
Step 7: Once the trouble spots you touched up are dry begin to separate the pages. This step takes the longest.
Step 8: put the dust jacket back on your book and enjoy!
TIP for cling wrap method: make sure the cling wrap is as tight as possible on the cover of the book, cut the cling wrap that will be around the corners of the book and just use tape there to make it easier.
TIP for corner taping: press the tape to the corners and then cut lines where the corner bends to be able to bend the edges down well
TIP for separating pages: you don’t need to separate the pages right away, you can leave them painted together but then you won’t be able to read the book. The fastest way to separate the edges is to bend the pages until the paint gives way and begins to part, use those parts as sections and separate each page individually. I like to watch a show or listen to an audiobook while I do this.
TIP on bible pages: I find that bible-thin paper doesn't always hold the paint well and can result in a flaky look to the edges of your book. The best fix for this I have found is to not put on a heavy coat of paint and use cheaper acrylic paint. Take extra care when separating the pages on these types of books.
Have fun giving your books a new look and as always, happy reading!


Comments
Post a Comment